Entity Designer
Entity Designer Overview
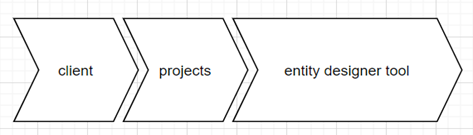
The Entity Designer tool mainly used to create entity, relationship between entities in Arango DB. This tool internally calls the Arango Adapter API’s.
In simple words,this tool used to create database, DB collections with schema in ArangoDB.
Each entity has multiple fields and each field has multiple properties(datatype, mandatory, autoIncrment etc).
This tool was placed under the project. For each project the entity designer tool has unique metadataId.
If we create entity under any project using entity designer tool that should be mapped to that respective metadataId.
Structure
Create New Entity
- This button used to create new entity in the UI screen. After clicking this button, this button will display following popup.
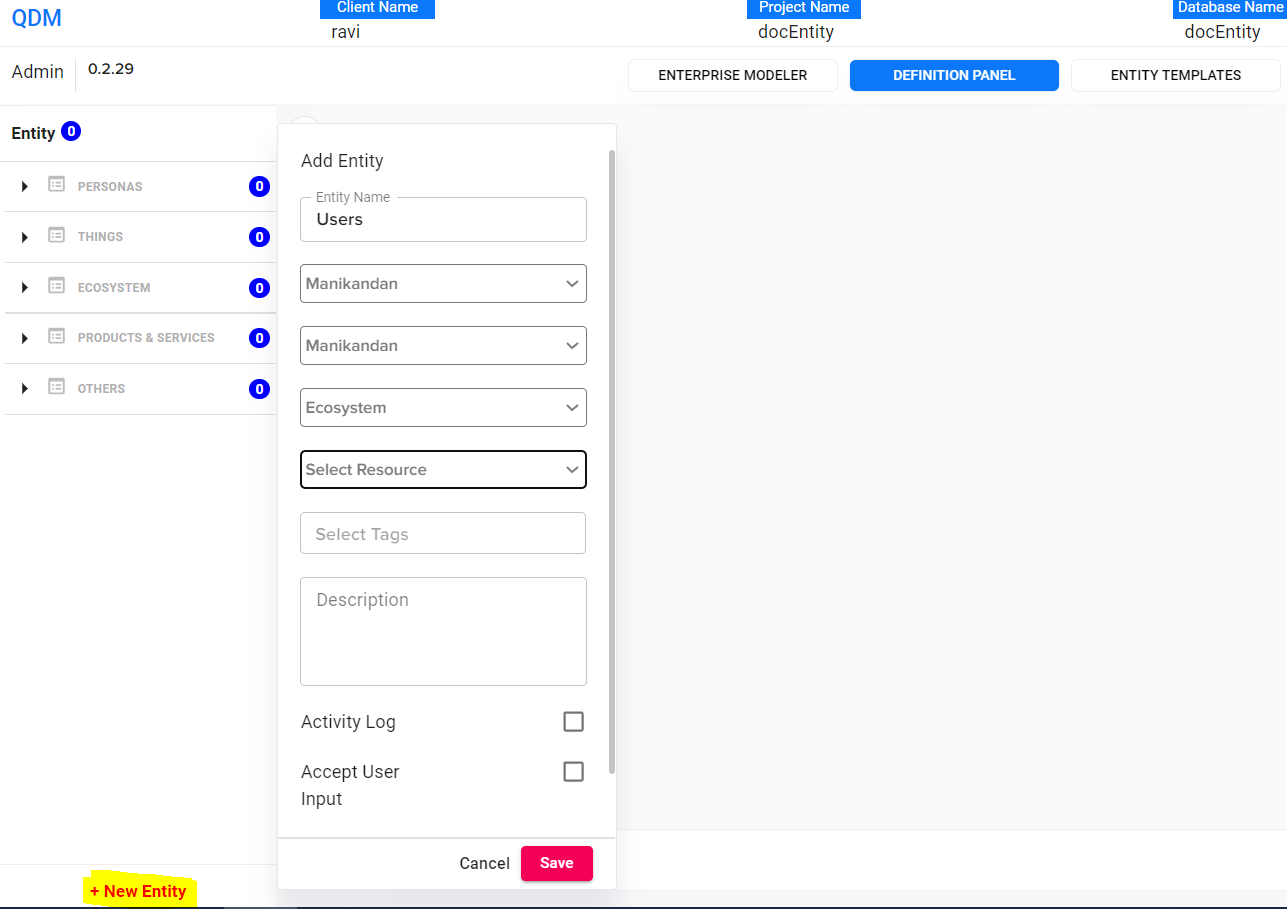
Here we need to fill the details, once done we have to click the save button. It will create a new entity
Save Entity
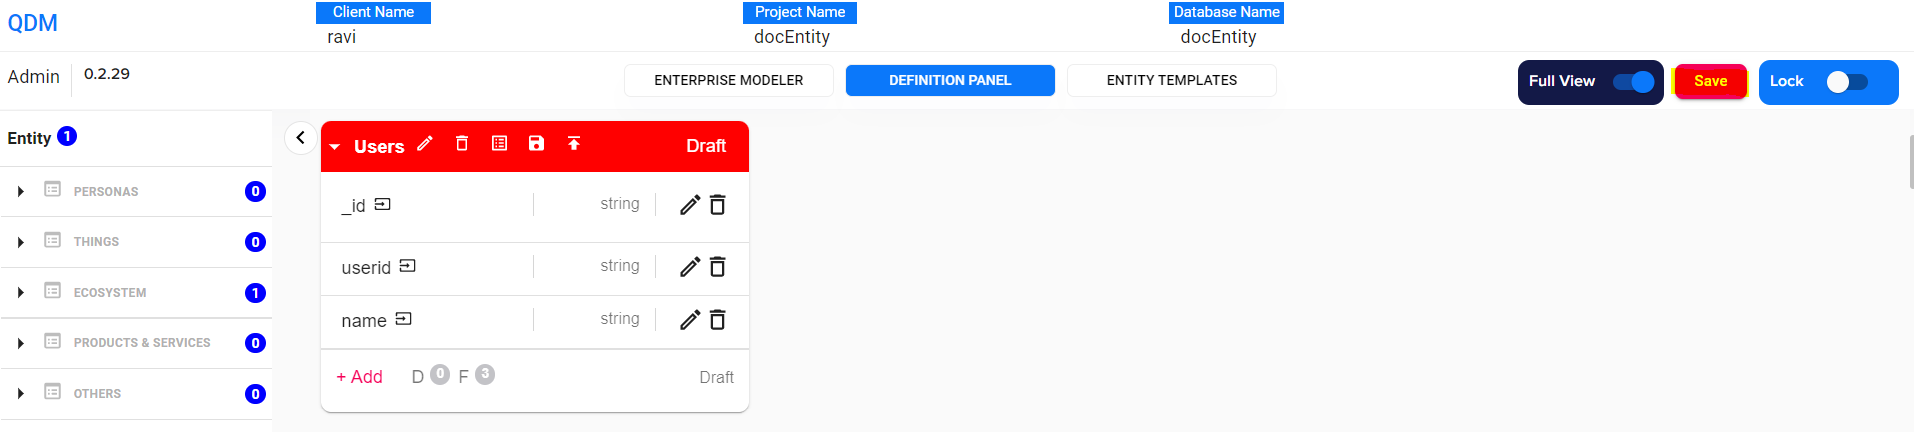
After creating the new entity, click the save button, it will internally invokes the save_schema API.
The save schema API will store the entity details to metadatadb(ATP_Platform).
Then in UI background, it will invoke the getschema API, this API will return the stored entity details.
Below was the UI screenshot for save schema button.
Publish Entity
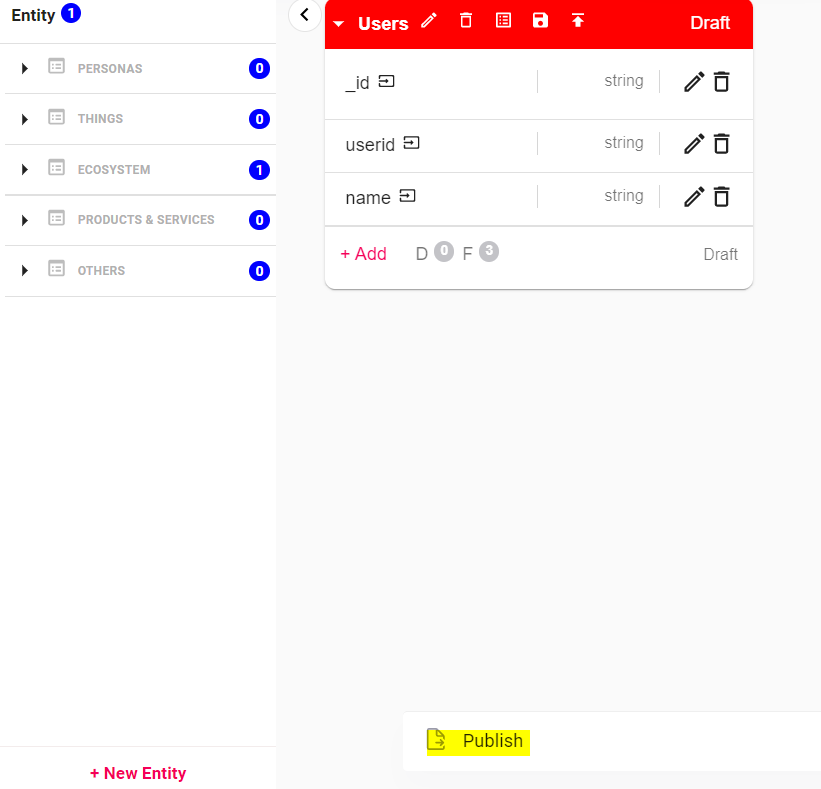
After getting the result from get schema API(UI).
Then we have to click the publish schema button, This API will create the database and collections with schema in ArangoDB server
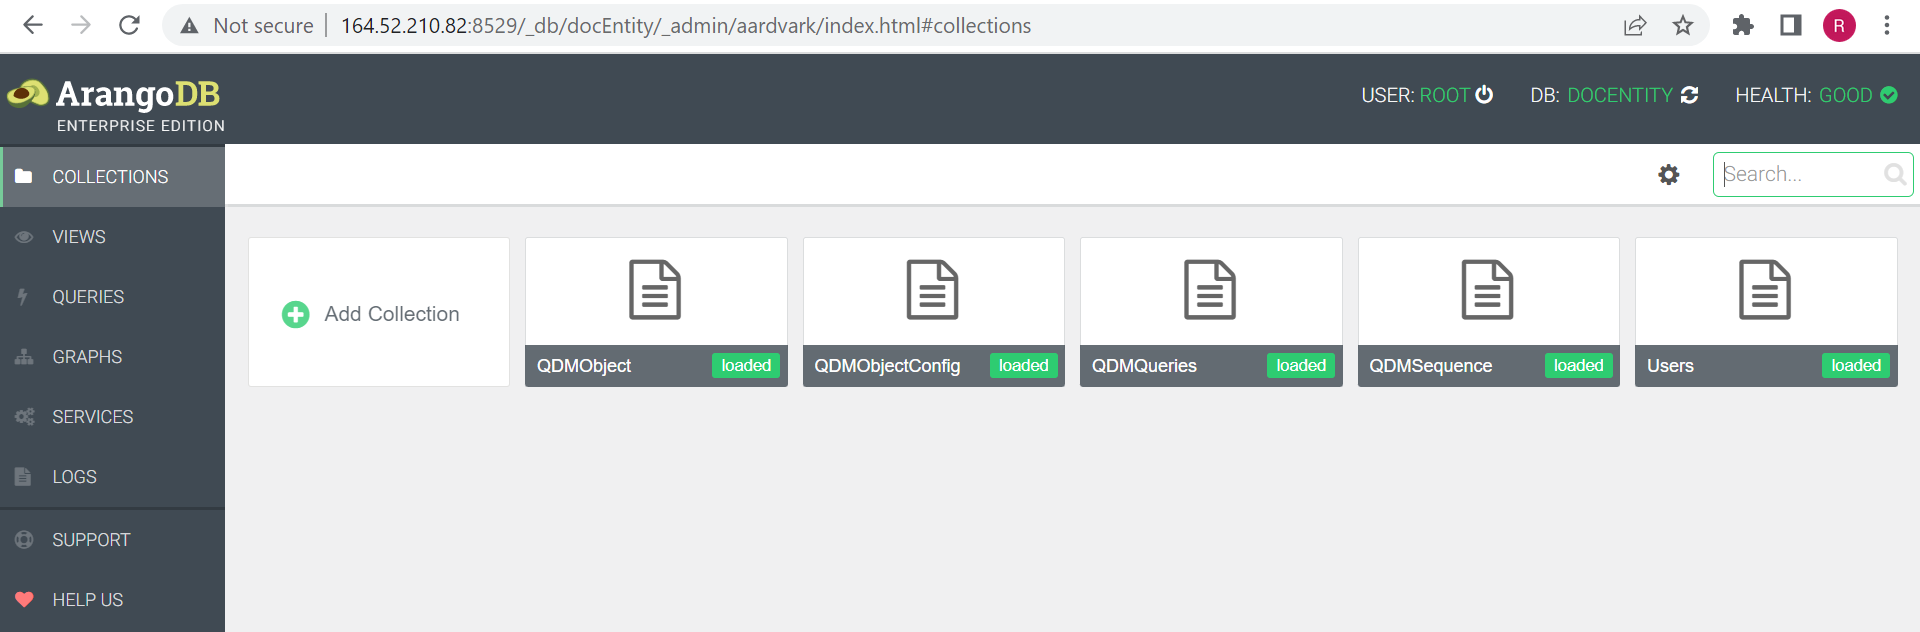
ArangoDB Database and Collections
After publish, the new database and entity(collections) will create in arangodb server.
The collection will create with schema.
Below was the database and collections screenshot
Collections with schema UI screen
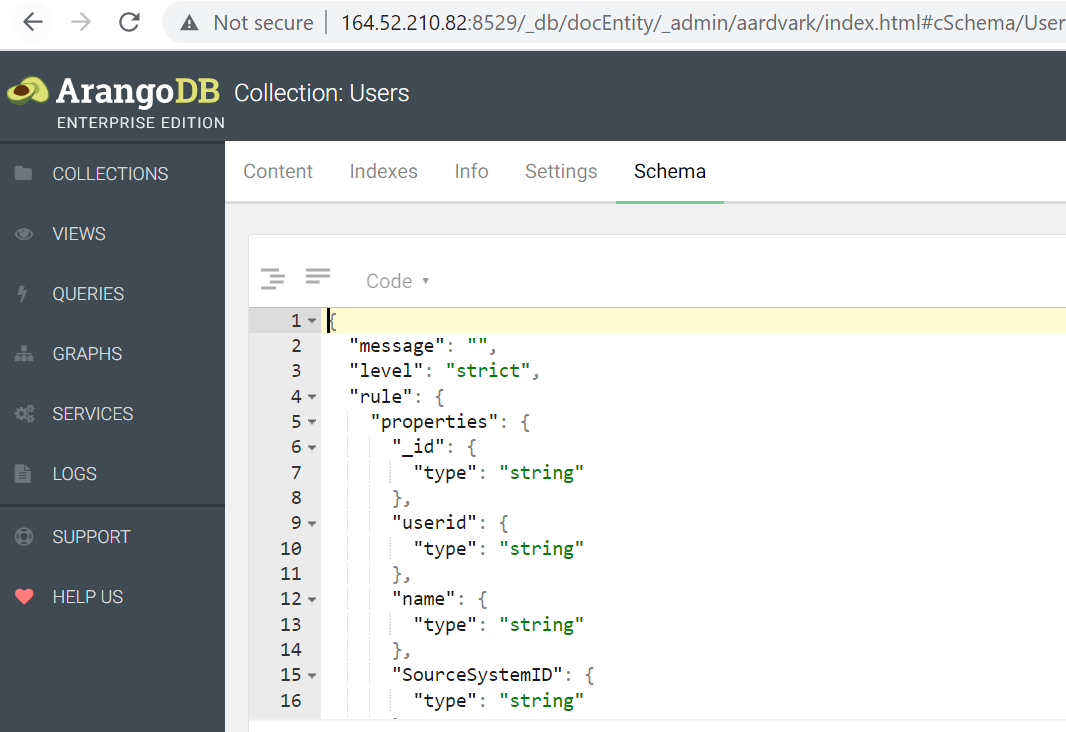
Entity Properties
Here, User was entity, the (userid, name) were entity fields and each fields have multiple properties
In each entities have multiple fields and each fields have its properties.
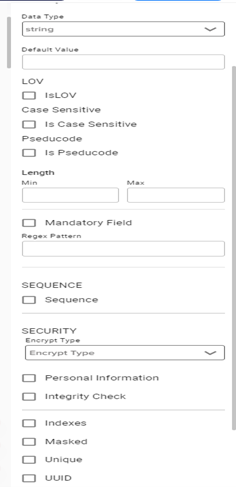
To view the properties, click the fieldname in the UI, it will show the properties slide popup in right side.
List of properties
DatatypeDefault ValueCase sensitiveAuto IncrementUUID GenerationSequence GenerateSecurity EncryptionUniqueMandatoryMaskedIndexesSecurity EncryptionRegex Pattern validationLength Min and Max validation checkNumber Min and Max validation check
Properties UI Screenshot
Entity Properties Explanation
Datatype control
- This was one of the controls on properties list. This was a dropdown control using this we can set field datatype (string, number, Boolean, array etc).
Default Value Control
This was one of the controls on properties list. This was a text box control using this we can set a default value to the field.
Like we can set number field default value to zero(0).
Case Sensitive Control
This control only for string datatype
This was a dropdown box control using this we can set a case sensitive option(Lowercase, uppercase, camel case) to the field.
Mandatory Control
- This was a check box control using this we can set a mandatory to the field. If the input document doesn’t have any mandatory field, then it will throw error.
Unique Control
- This was a check box control using this we can set a unique to the field. It will not allow two documents have same value in the DB side.
Masked Control
- This was a check box control. If we enable masked to any field in the entity. Then, If user upsert document with the field with value Arango adapter API will convert the value to base64 format and store to DB.
Securirty Encryption Control
This control only for string datatype
Arango Adapter supports (AES, MD5) encryption method. In entity designer tool side, if we enable any field with any one of mentioned encryption method, the Arango adapter convert the incoming field value to the encryption methods
Auto Increment Control
This control only for number datatype
This was a check box control. If we enable Auto Increment to any field in the entity. Then, the field.
Value automatically incremented from 1 to and so on.
UUID Control
This control only for string datatype
This was a check box control. If we enable UUID to any field in the entity. Then, the field Value automatically generate the UUID and then store to database.
Regex Pattern Validation
This was a text box control. Based on the given regex the validation will happen, if the pattern doesn’t match then it will throw error.
Length min and max Validation
This control only for string datatype
This was a text box control. There was a two-text box in the UI one for min and another for max. Based on the given value in the textbox the field value length validation will happen.
min and max value validation
This control only for number datatype
This was a text box control. There was a two-text box in the UI one for min and another for max. Based on the given value in the textbox the field value validation will happen.
Entities with relationship
In entity designer tool, we can link the field from one collection to another collection field.
We can achieve following relationship in entity designer
One to one relationshipOne to Many relationshipMany to one relationshipMany to Many relationship
In UI, click the right arrow icon which is placed near the fieldname, Please refer below screenschot
![]()
After clicking, it will show the popup for entity relationship
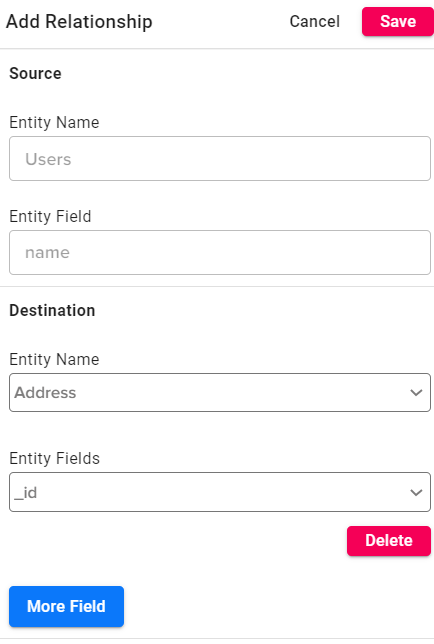
In UI, separated into two sections, one was source, and another was destination.
The source means, from entity and destination means to entity.
Here we can link the one field from source(collection) to one field from destination collection.