Task & document workflow
HOME PAGE
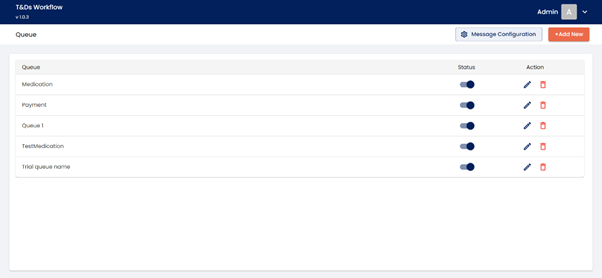
This screen will allow the user to view the existing queues present for a project.
MESSAGE CONFIGURATION
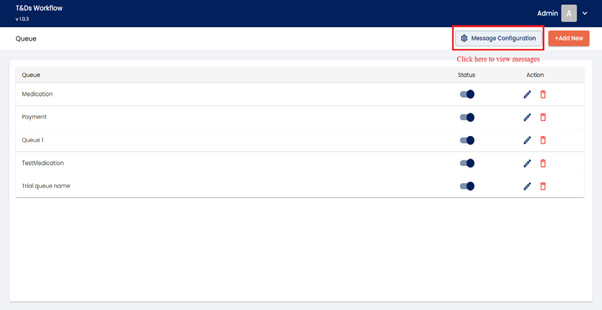
Allows user to create new message by clicking the Message configuration button on the top right on the screen 2.
MESSAGE CREATION
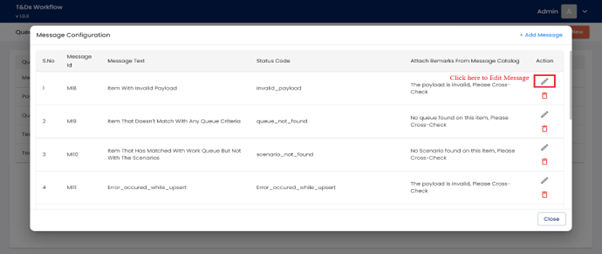
When user clicks on the Message Configuration button this below screen 3 will be presented to the user to configure the message. Allow user to create new message by clicking the Add Message button on the top right on the screen 3
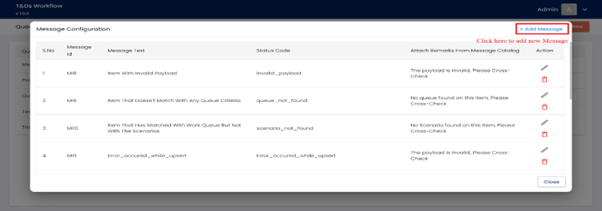
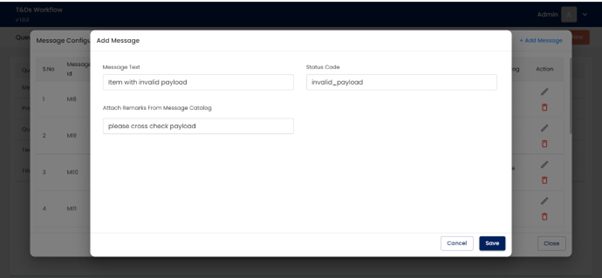
When user clicks on the Add Message button this below Screen 4 will be presented to the user for message configuration.
Message creation includes the following fields:
Message Text – required field, will be a text box which allows user to enter the name of the message text. Text validation only for alphabet will be applicable.
Status Code – required fields, will be text box which allows user to enter the code for the message.
Attach Remarks from Message Catalog – required fields, will be a text box where user will be entering remarks for the message.
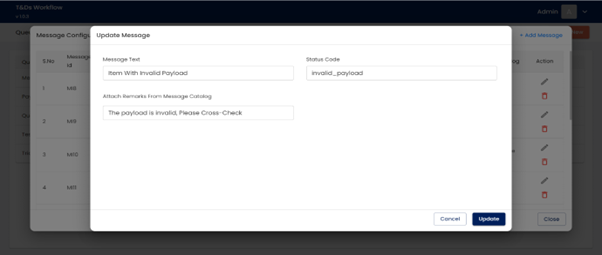
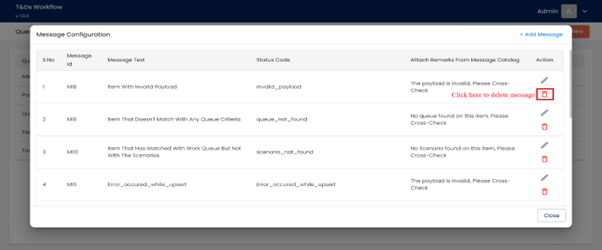
After message configuration, allows user to edit and delete the message by clicking on edit and delete icon from Screen 5, below screen will be shown the list of messages.
STEPS TO CREATE QUEUE
Allows user to create new queue by clicking the Add New button on the top right on the screen 8.

When user clicks on the Add new button this below Screen 9 will be presented to the user to create queue, input schema, state, action, and scenario.
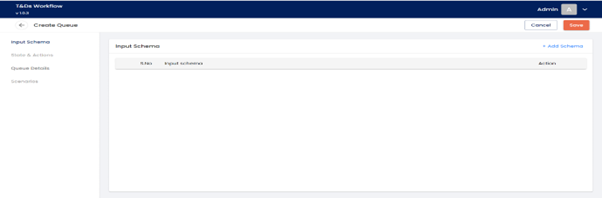
INPUT SCHEMA CREATION
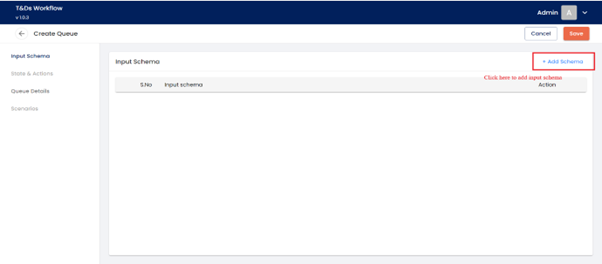
Input schema includes the following fields:
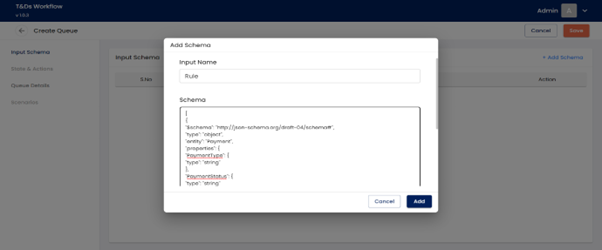
Input Name – required field, will be a text box where user will be able to enter name of the input schema.
Schema – required field, will be multi line text field user has to give the input payload JSON schema
Once user enters the schema it should be store in the local session until the queue id is generated.
QUEUE CREATION
After the input schema user will be able to create the queue details from Screen 12 below screen will be shown to the user for queue creation.
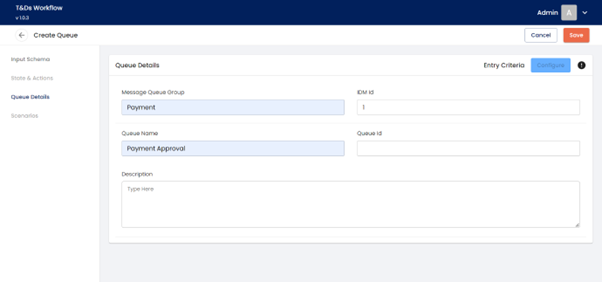
Queue details includes the following fields,
Message Queue Group – will be textbox and user will be able to give the queue group.
IDM ID –
Queue Name – required fields, will be a text box and user will be able to enter the Queue Name.
Queue Id – will be a text field which will be view only field, while inserting the queue this will be auto generated by the database service
Description – will be multi line text field where use can enter some description about the queue.
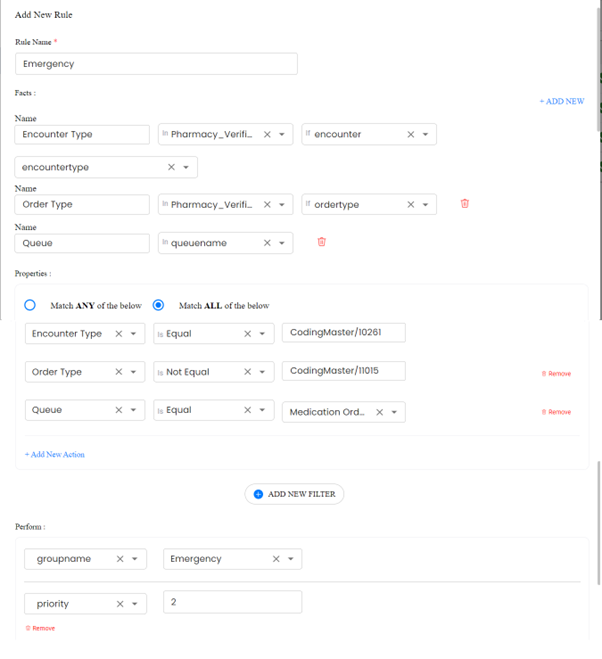
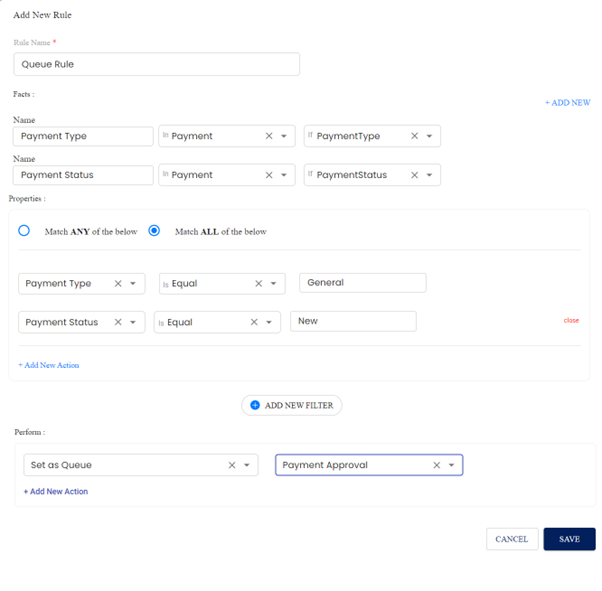
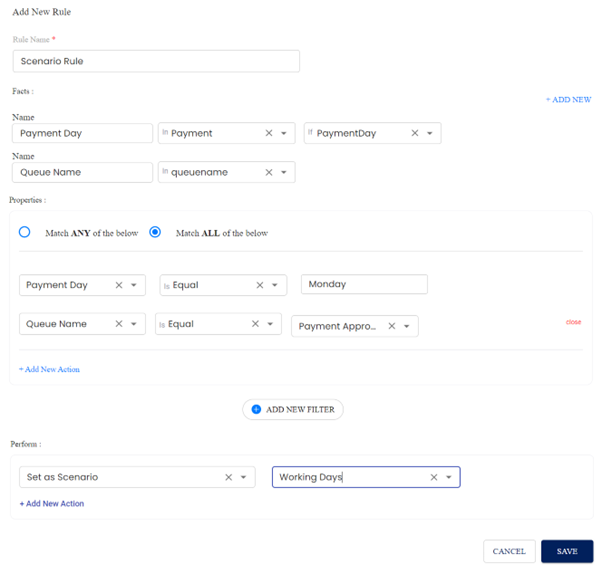
When user clicks on the Configure button Screen 13(Rule Builder) will be presented to the user. This screen allows the user to configure the queue entry criteria.
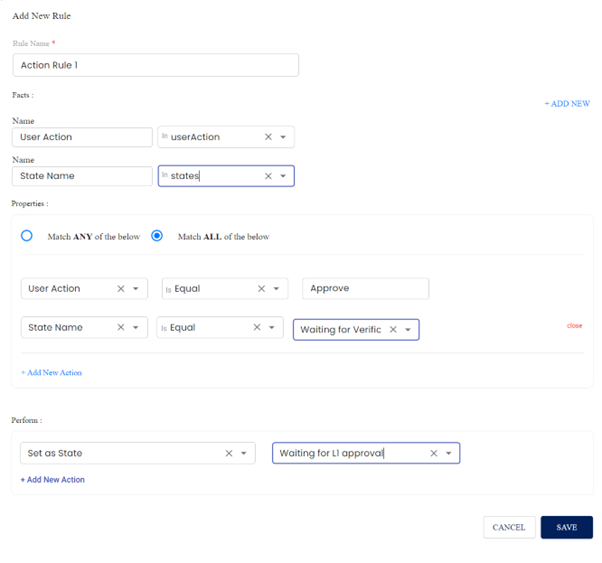
The Rule Builder is divided into Four Sections:
Rule name at the top
Facts in the middle – Fact is nothing but alias for the field name
Properties in the second middle – in this section, user can be able to enter the condition.
Perform action in the bottom – in this section, the user can be able to set the perform action. Once the rule has been executed then this action will be performed.
STEPS TO CREATE STATE AND ACTION
When user clicks on the State & Action from the sidebar this below Screen 14 will be presented to the user to create state and actions and allows user to create new state by clicking the Add State button on the top right on the Screen 14.

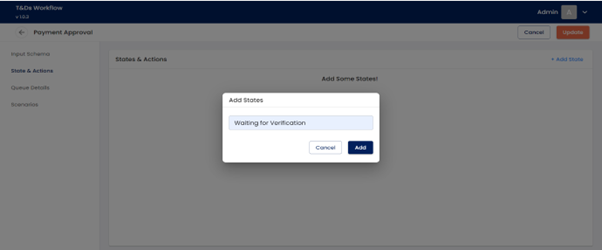
State includes the following fields:
Add State – required field, will be a text box, user will be able to enter the State Name.
After State, user can create the action from Screen 16, below screen will be shown to the user to create action and it shows the list of the state for the queue of the project.
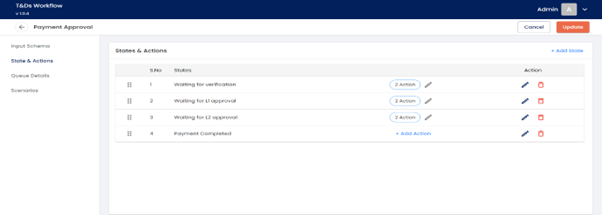
When user clicks on the Add Action button from the Screen 16, this below screen presented to the user for action creation.
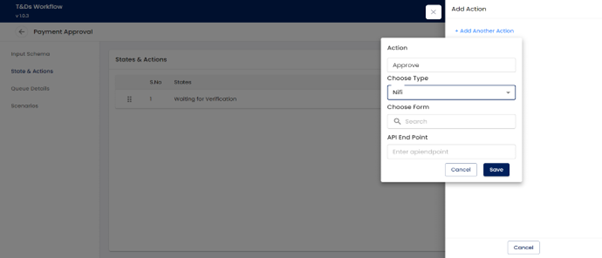
Action includes the following fields:
Action – required field, will be a text box, user will be able to enter the Action Name.
Choose Type - will be a dropdown and user will be able to select type of the service. This list data includes NIFI, API and Service Call.
API End Point – will be a text box, user will be able to enter the API URL.
STEPS TO CREATE SCENARIO
After state and action creation, Screen 19 allows user to create new scenario for the queue by clicking on the Add Scenario button in the top right on the screen.
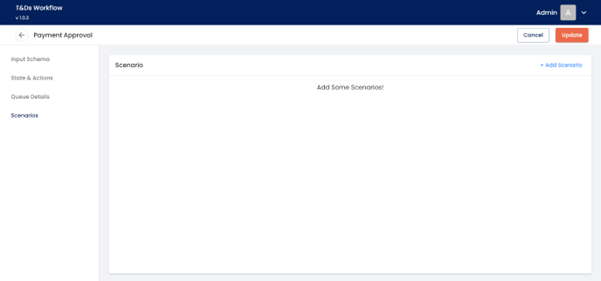
When user clicks on the Add Scenario button from the Screen 19, this below screen presented to the user for scenario creation.
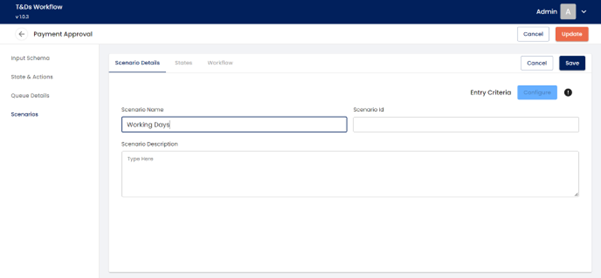
Scenario includes the following fields:
Scenario Name – required field, this will be the text box and user will be able to enter the name of the scenario.
Scenario Id – will be a text field which will be view only field, while inserting the scenario this will be auto generated by the Database service.
Scenario Description – will be a multi-line text field where use can enter some description about the scenario.
After scenario, this below screen 21 will be present to the user. In this screen allows the user to edit and delete the details of the scenario by clicking the edit and delete icon.

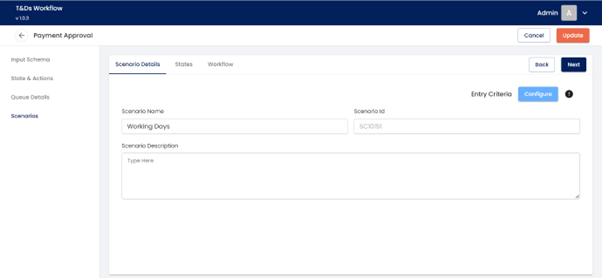
Screen 23 will be displayed when user clicks on the Configure button from Screen 22. This screen allows the user to configure the scenario entry criteria.
STEPS TO CREATE SCENARIO STATE MAPPING
For scenario state mapping, Screen 24 will be displayed when user click on the edit button in scenario list. This screen will be used to include state, action, and workflow for that scenario.
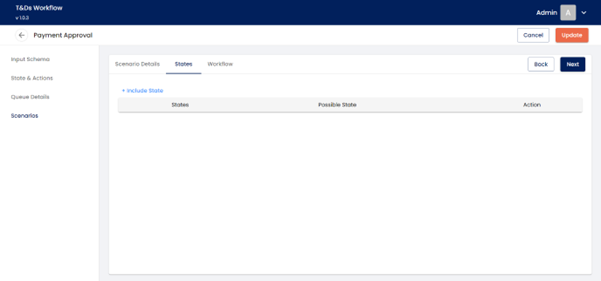
State Tab When user click on the +include State button the Screen 25 will be displayed. In this screen user will be added the state which are all used for the scenario.
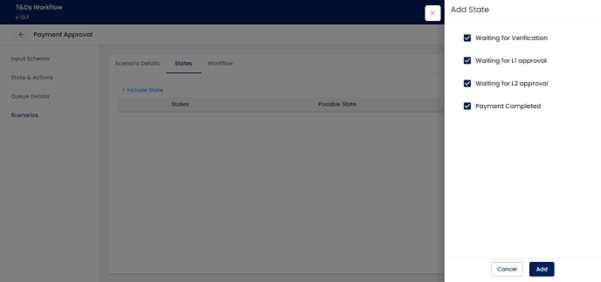
After selection of state, the Screen 26 will be displayed. In this screen the user will be set start state and End state for the scenario. When user click on the edit button in action list, the Screen 27 will be displayed.
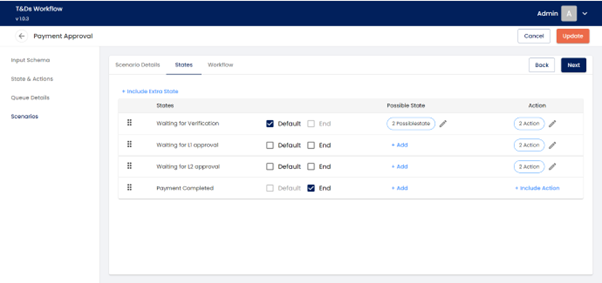
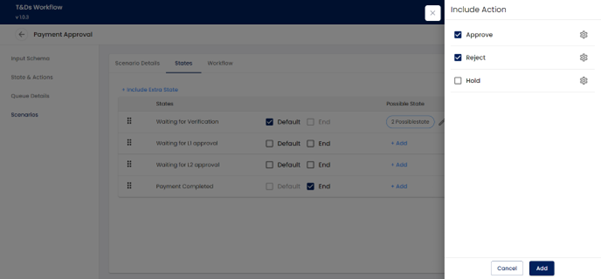
Screen 27 will be used to select the actions against the state for the scenario.
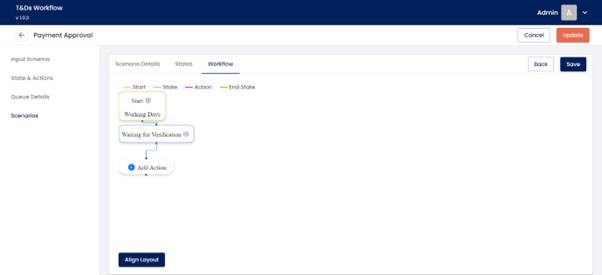
Workflow tab
In this screen (Screen 28) the user will be able to create a workflow for the scenario. The start state will be displayed first when user click on the workflow tab. The state contains Add action Button, which is used to add the actions.
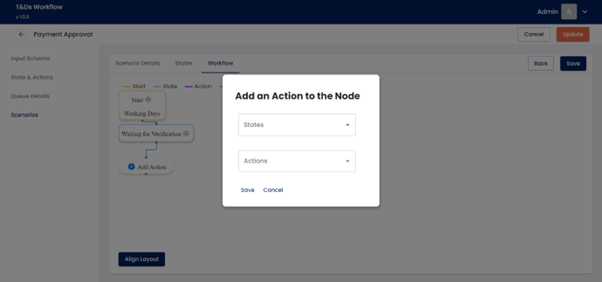
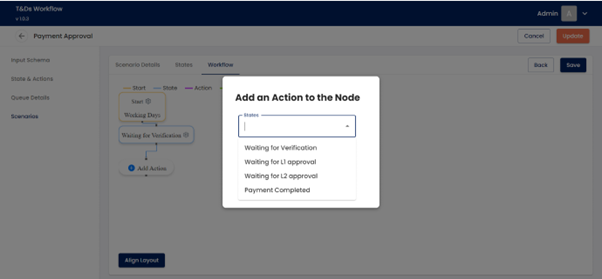
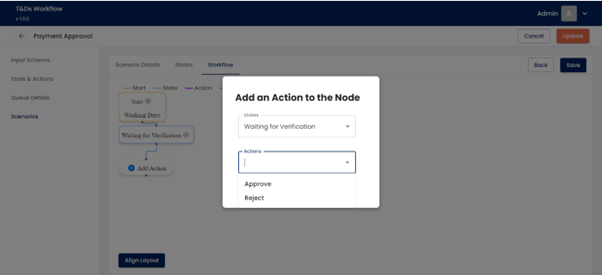
Screen 29 will be displayed the list of the action and this will be a dropdown list here the user can able to select the actions.
After selecting the action, the user will be add the next state for that action by clicking on the Add state button.
Screen 32 will be displayed once the workflow is completed. This is the structure of the scenario workflow what are all the state and actions were going to executed for that scenario,
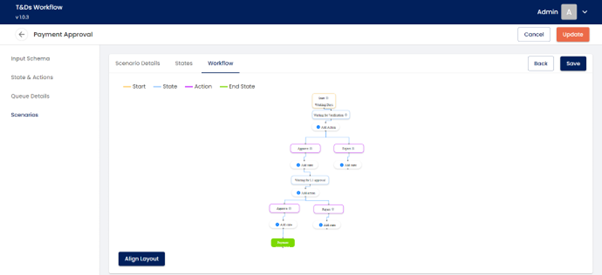
Screen 33 will be displayed when user clicks on the settings button from Screen 32. This screen allows the user to configure the rule entry criteria. Each actions having separate entry criteria.
PRIORITY GROUPING
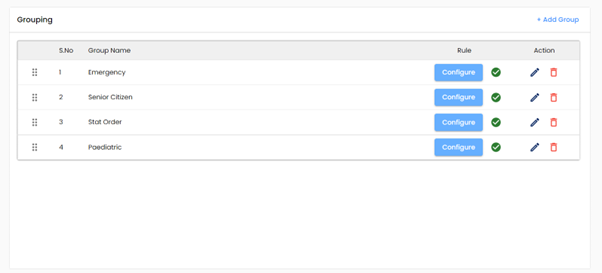
Grouping is used to set the priority for the queue. Screen 34 will be displayed the list of the groups.
One queue having more than one group. In this screen user will be able to configure the rule and add the details of the group.
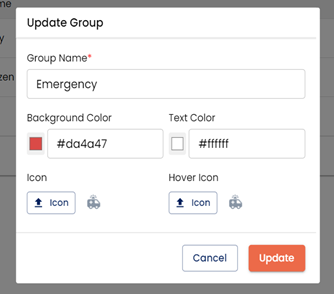
Screen 35 will be used to enter the details of the group.
Group includes the following fields:
Group Name – required field, this will be the text box and user will be able to enter the name of the group.
Background and Text Color – this will be the text box and user will be able to enter the colour for background and text colour
icon – this will be a file upload and user will be able to upload the icon for the group
Screen 36 will be used to entry the entry criteria for the group. In this group user can enter the priority for that group.